Jul 8, 2016

Solving ARV7510PW22 overheating issue

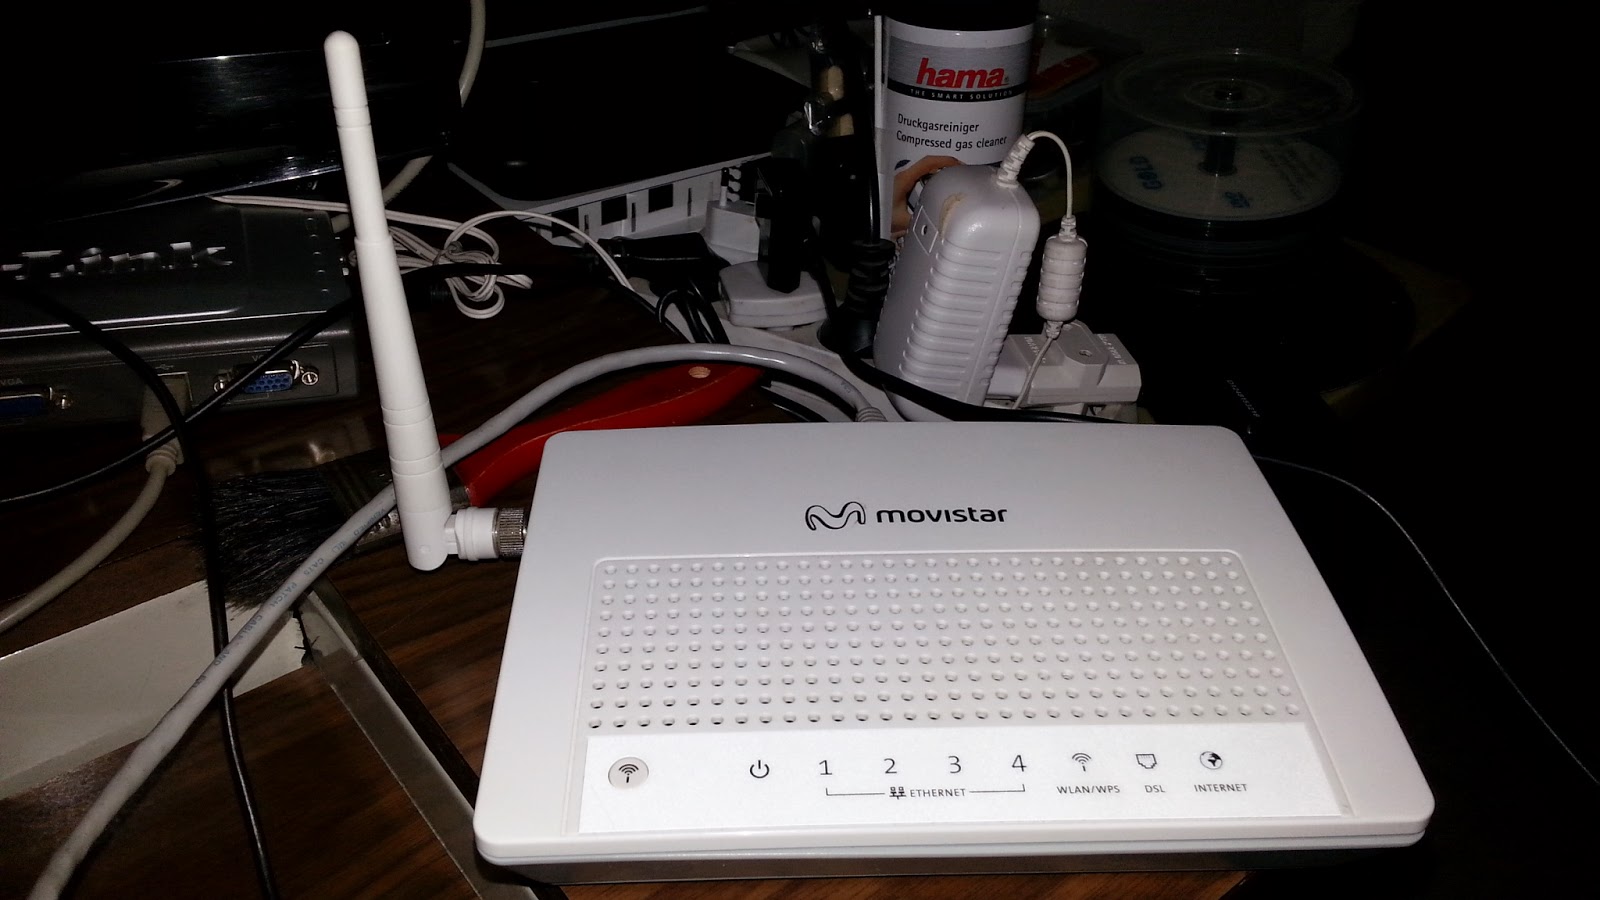
As I started testing LEDE/OpenWrt in ARV7510PW22 for the first time I noticed it overheats more than accepatble and its WIFI for some reason gets stuck and sometimes gets disabled after a few minutes of usage. At first, I suspected its RaLink Wifi chip but after a few tests it turned out an overheating issue.

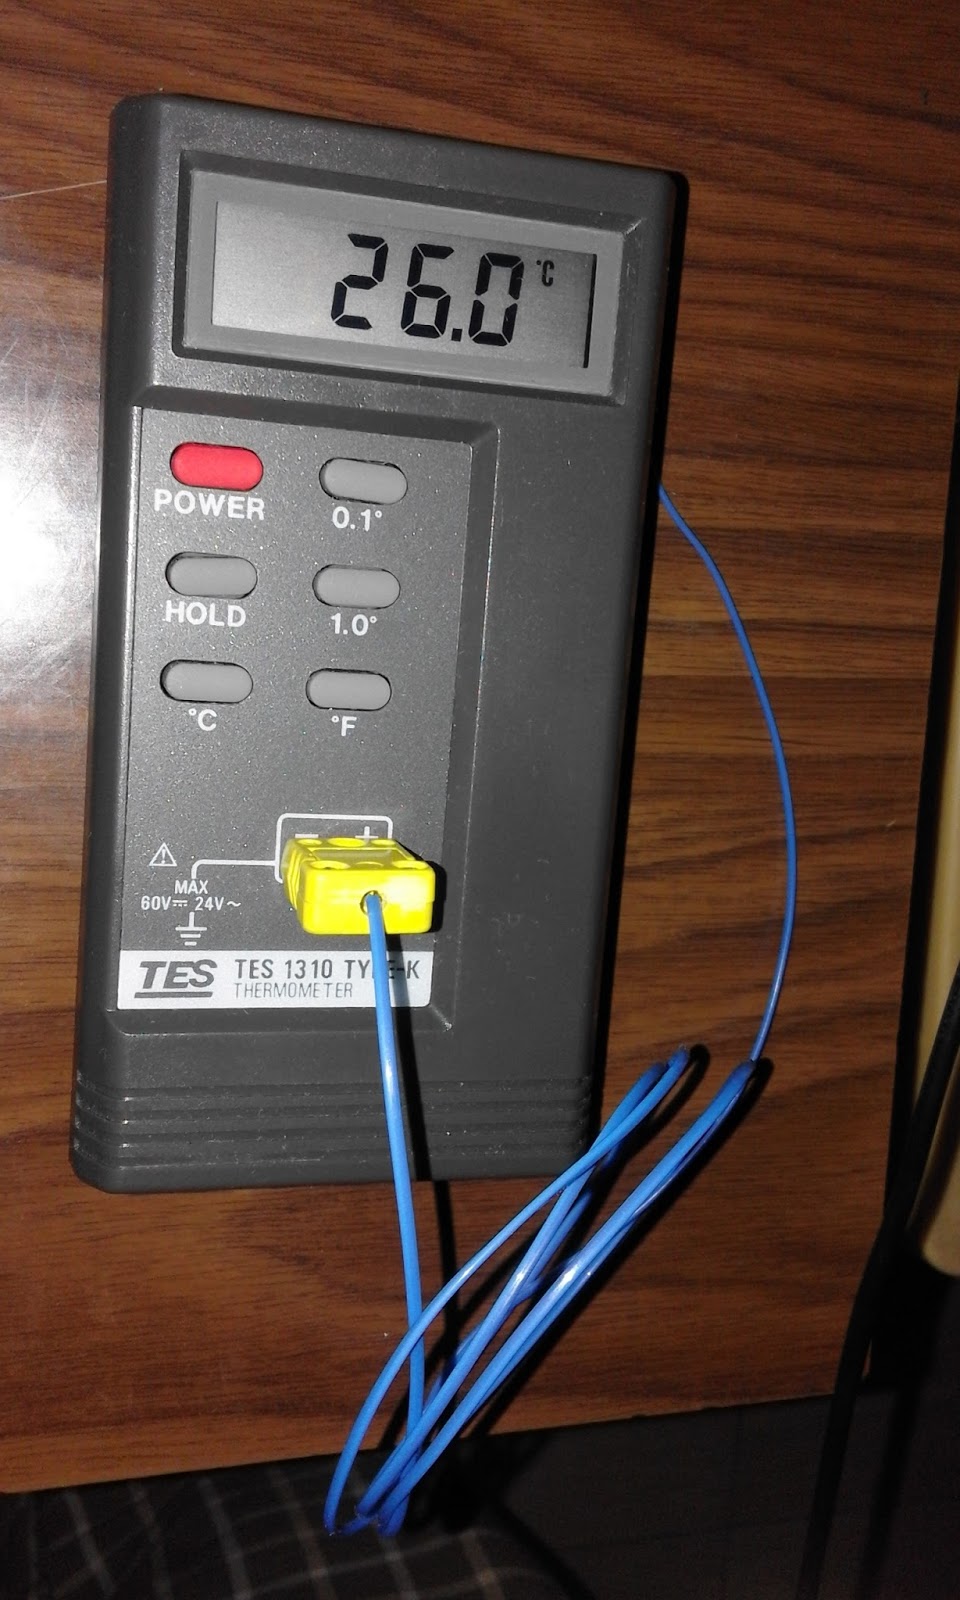
With this digital thermometer its CPU reached more than 52°C and was still climbing up.


I grabbed a PC fan rated 12v / 0.13A.


Made an opening in router's back. Glued the fan.


Then I made a power connector with male in one side and female in the other. I didn't want to solder the fan directly in the router's power input.

This router needs 15v / 1.20A. The charger I use is rated 15v / 1.66A. The fan is rated for 12v / 0.13A. So it's better to step down that 15v for the fan and make it 12v.

Ohm's Law to the rescue:  (15v - 12v) / 0.13A = 23 Ohms.

However, with 12v it's a bit noisy, so I needed more resistance. I combined a 22 Ohm + 47 Ohm resistor in serial.


And that's all. I'm using it and stressing it under heavy load. So far so good ;)


May 28, 2016

How to flash ARV7519RW22 with LEDE/OpenWRT

This is a complete howto to use LEDE/OpenWRT on ARV7519RW22

Pre-requirements:

* Pay attention to details. Don't rush up in copying/pasting + some steps are case sensitive !
* UART-to-TTL usb cable.
* Basic soldering skills (you need to do it once)
* GNU/Linux machine (I use Arch Linux) and basic skills using it.
* Usb memory stick formatted with FAT16/FAT32
* Install these packages:
tftp-hpa : tftp server
picocom : terminal emulation program
lrzsz : xmodem, ymodem and zmodem file transfer protocols

to install them in Arch: pacman -Sy tftp-hpa picocom lrzsz

First of all, many thanks to the first OpenWRT/LEDE explorers who have dealt with this router.

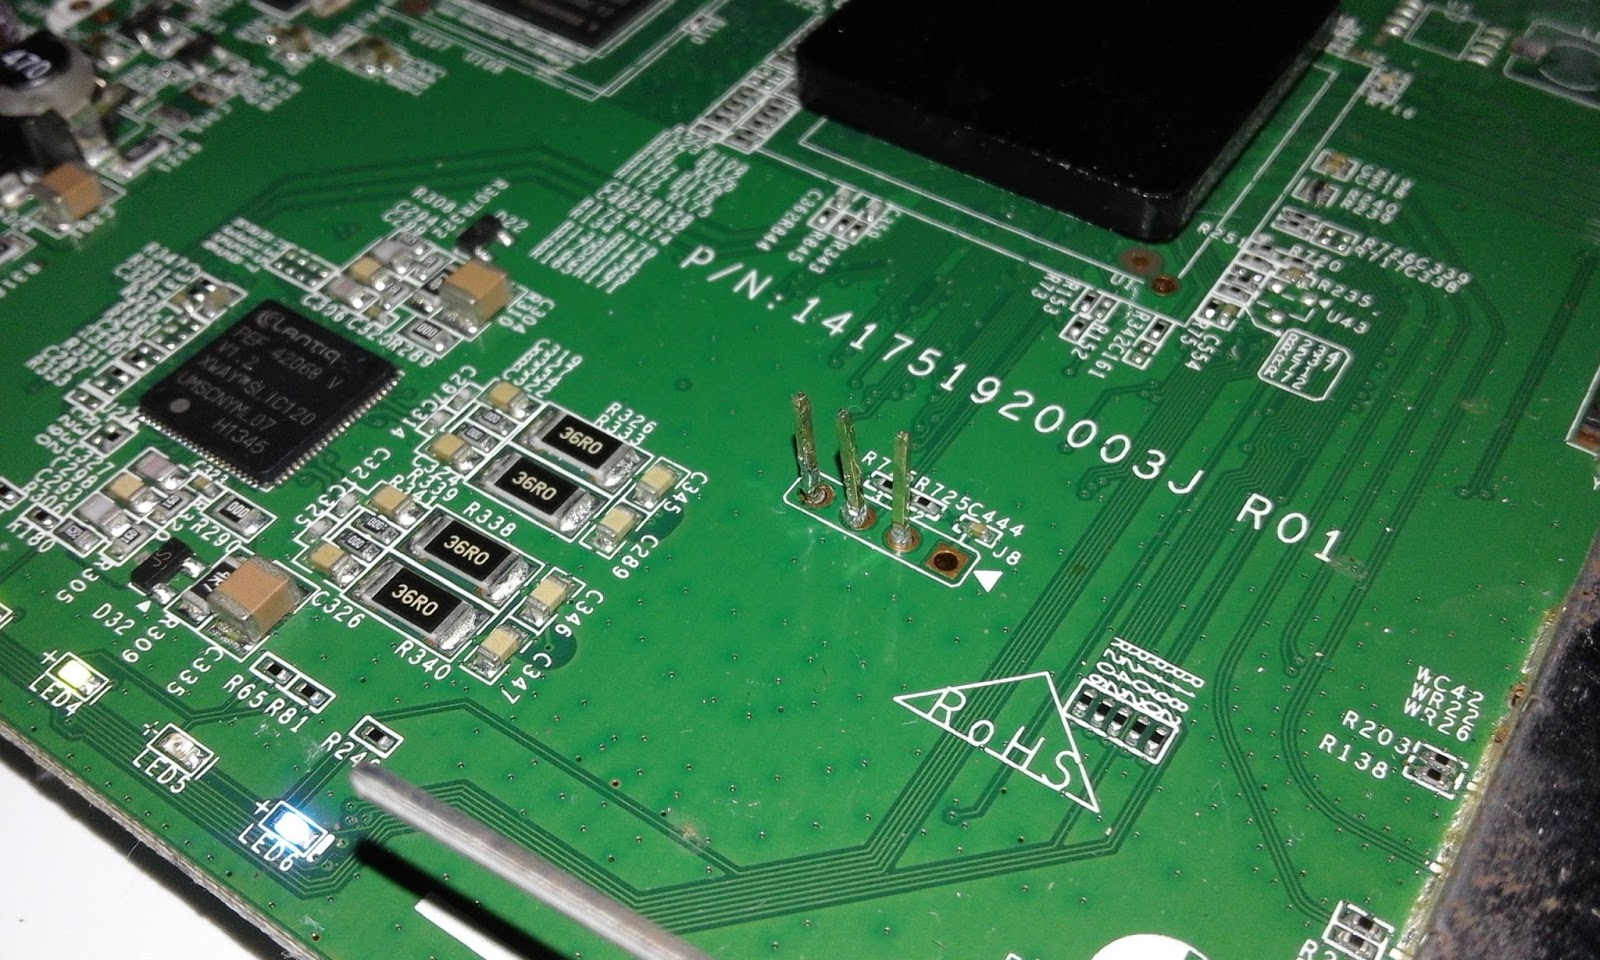
You need to solder these pins


Most UART cables come with four connector. Don't connect the one named VCC or 5v.


Only connect GND, RX and TX !!


If not sure, use a multimeter to identify the 5v/VCC connector in your UART cable.

Download these:
uboot.bin - this is the bootloader
lede-arv7519rw22.bin - this is the LEDE (OpenWRT) firmware built May, 27 2016.
lede-arv7519rw22.bin - this is the LEDE (OpenWRT) firmware built June, 20 2016 (rev 750)
lede-arv7519rw22.bin - this is the LEDE (OpenWRT) firmware built July, 03 2016 (rev 865)

After you have soldered those pins, installed required packages and connected the UART usb cable to your Linux machine, open Terminal and issue this command.


I - Making backup of the original firmware

picocom -b 115200  /dev/ttyUSB0

Note: if it tells you you don't have permissions to access /dev/ttyUSB0 then use sudo or associate your user account with the group uucp.

1. Copy this password (ctrl+c or ctrl+shift+c): Oh!123Go

2. As soon as you power up the router quickly hit space bar 3 times

3. When asked for the key/password paste the previously copied password (ctrl+v or ctrl+shift+v)

4. Press  !

5. Press  j  and wait till it finishes booting up

6. Connect a Fat16/32 formatted usb memory stick and wait a few seconds till it gets detected and mounted automatically

7. Type in these instructions one by one followed by enter

cat /dev/mtd0 > /tmp/usb/a1/mtd0.bin
sync
cat /dev/mtd1 > /tmp/usb/a1/mtd1.bin
sync
cat /dev/mtd2 > /tmp/usb/a1/mtd2.bin
sync
cat /dev/mtd3 > /tmp/usb/a1/mtd3.bin
sync
cat /dev/mtd4 > /tmp/usb/a1/mtd4.bin
sync
cat /dev/mtd5 > /tmp/usb/a1/mtd5.bin
sync
cat /dev/mtd6 > /tmp/usb/a1/mtd6.bin
sync
cat /dev/mtd7 > /tmp/usb/a1/mtd7.bin
sync
cat /dev/mtd8 > /tmp/usb/a1/mtd8.bin
sync
cat /dev/mtd9 > /tmp/usb/a1/mtd9.bin
sync
cat /dev/mtd0 > /tmp/usb/a1/mtd0a.bin
sync
cat /dev/mtd1 > /tmp/usb/a1/mtd1a.bin
sync
cat /dev/mtd2 > /tmp/usb/a1/mtd2a.bin
sync
cat /dev/mtd3 > /tmp/usb/a1/mtd3a.bin
sync
cat /dev/mtd4 > /tmp/usb/a1/mtd4a.bin
sync
cat /dev/mtd5 > /tmp/usb/a1/mtd5a.bin
sync
cat /dev/mtd6 > /tmp/usb/a1/mtd6a.bin
sync
cat /dev/mtd7 > /tmp/usb/a1/mtd7a.bin
sync
cat /dev/mtd8 > /tmp/usb/a1/mtd8a.bin
sync
cat /dev/mtd9 > /tmp/usb/a1/mtd9a.bin
sync

8. Now check the signature of the mtd files

md5sum /tmp/usb/a1/mtd*

Every mtdX.bin must have the same signature as mtdXa.bin . Ex: mtd0.bin == mtd0a.bin
if not redo the operation of backing up the original firmware.

9. Unmount and remove the usb afterwards
umount /tmp/usb/a1

Later, you can generate a full dump from those mtd files in case you want to restore the original firmware.
To do that copy them in a folder on your machine, open Terminal from that folder and run this:

cat mtd0.bin mtd1.bin mtd2.bin mtd3.bin mtd4.bin mtd5.bin mtd6.bin mtd7.bin mtd8.bin mtd9.bin > dump.bin


10. Power down you router and press ctrl+a followed by ctrl+q  to  quit picocom


II - Replacing the bootloader with U-Boot

! Pay attention to case sensitivity !

1. On your Linux machine, put the uboot.bin file in a folder and start Terminal from that folder.

2. run picocom with Xmodem support like this:

picocom -b 115200  /dev/ttyUSB0 --send-cmd "sx -vv"

3. Copy this password (ctrl+c or ctrl+shift+c): Oh!123Go
as soon as you power up the router quickly hit space bar 3 times

4. When asked for the key/password paste the previously copied password (ctrl+v or ctrl+shift+v)

5. Press  !

6. Press  U
That's a capital u

7. Press  0
That's a zero

8. Press Y
That's a capital y

9. Then press ctrl+a followed by ctrl+s  and write down uboot.bin as filename and hit enter to start sending it

The process will take 2 to 3 mins to complete. Don't interrupt the process !


At the end of it you will get something like this

Xmodem sectors/kbytes sent: 2533/316kRetry 0: NAK on sector
Retry 0: NAK on sector
Retry 0: No ACK on EOT

Transfer incomplete

*** exit status: 128 ***
erase from location B0020000 done
erase from location B0040000 done

Starting to write flash ...write length 0x0004F300
0123456789abcdefghij
Start checking: flash area 0 length 324352 ...Done.


Note: If you are not sure it went well, don't reboot or power off the router, just redo the flashing steps starting from  !  as explained above.


10. Now that you probably have flashed the new u-boot, power off then power on your router.

You should get something like:

U-Boot 2014.01-openwrt1 (May 16 2014 - 00:08:52) arv7519rw

Board: Lantiq ARV7519RW VRX200 Family Board
SoC:   Lantiq VRX288 v1.2
CPU:   500 MHz
IO:    250 MHz
BUS:   250 MHz
BOOT:  NOR
DRAM:  128 MiB
Flash: 32 MiB
*** Warning - bad CRC, using default environment

In:    serial
Out:   serial
Err:   serial
Net:   ltq-eth
Hit any key to stop autoboot:  0 
Wrong Image Format for bootm command
ERROR: can't get kernel image!

11. Type in this command

printenv

You should get something like this:

addconsole=setenv bootargs $bootargs console=$consoledev,$baudrate
addeth=setenv bootargs $bootargs ethaddr=$ethaddr
addip=setenv bootargs $bootargs ip=$ipaddr:$serverip::::$netdev:off
addmachtype=setenv bootargs $bootargs machtype=arv7519rw
baudrate=115200
bootcmd=bootm ${kernel_addr}
bootdelay=2
consoledev=ttyLTQ1
ethact=ltq-eth
ethaddr=00:01:02:03:04:05
ipaddr=192.168.1.1
load-uboot-nor=tftpboot u-boot.bin
load-uboot-norspl=tftpboot u-boot.ltq.norspl
load-uboot-norspl-lzma=tftpboot u-boot.ltq.lzma.norspl
load-uboot-norspl-lzo=tftpboot u-boot.ltq.lzo.norspl
loadaddr=0x81000000
netdev=eth0
serverip=192.168.1.2
stderr=serial
stdin=serial
stdout=serial
update-uboot-nor=run load-uboot-norspl-lzo write-uboot-nor
write-uboot-nor=protect off 0xB0000000 +$filesize && erase 0xB0000000 +$filesize && cp.b $fileaddr 0xB0000000 $filesize

Environment size: 886/8188 bytes


Keep this picocom terminal open for now and carry on with the below steps.


III - Flashing LEDE firmware

1. Copy lede-arv7519rw22.bin to your tftp server folder:

on Arch:

sudo cp -iv lede-arv7519rw22.bin /srv/tftp/

sudo chmod 644 /srv/tftp/lede-arv7519rw22.bin

ls -l /srv/tftp/


2. Start/restart the tftp server

on Arch or any systemd Linux distro:

sudo systemctl restart tftpd.socket

3. (a boring part)

Connect an ethernet cable between your linux machine and your arv7519rw22 router.

On your linux machine type in terminal:

ip link

you should get something like 

1: lo: mtu 65536 qdisc noqueue state UNKNOWN mode DEFAULT group default qlen 1
    link/loopback 00:00:00:00:00:00 brd 00:00:00:00:00:00
2: enp2s0: mtu 1500 qdisc fq_codel state DOWN mode DEFAULT group default qlen 1000
    link/ether 00:26:18:36:e0:c3 brd ff:ff:ff:ff:ff:ff


Let's assume enp2s0 is your ethernet card. If not, adjust its name in the following commands.

Setting up a wired connection:

sudo ip link set enp2s0 down
sudo ip link set enp2s0 up
sudo ip addr flush dev enp2s0
sudo ip addr add 192.168.1.2/24 broadcast 192.168.255.255 dev enp2s0
ip addr show enp2s0


Now back to the picocom terminal, copy/paste these lines one by one. Hit enter after each line to validate.

setenv write-openwrt 'tftpboot lede-arv7519rw22.bin && protect off 0xB0080000 +$filesize && erase 0xB0080000 +$filesize && cp.b $fileaddr 0xB0080000 $filesize'

setenv kernel_addr 0xB0080000

saveenv

run write-openwrt


After a few seconds, you should get something like:

ltq_phy: addr 0, link 0, speed 10, duplex 0
ltq_phy: addr 17, link 1, speed 100, duplex 1
ltq_phy: addr 18, link 0, speed 10, duplex 0
ltq_phy: addr 19, link 0, speed 10, duplex 0
ltq_phy: addr 20, link 0, speed 10, duplex 0
Using ltq-eth device
TFTP from server 192.168.1.2; our IP address is 192.168.1.1
Filename 'lede-arv7519rw22.bin'.
Load address: 0x81000000
Loading: T #################################################################
#################################################################
#################################################################
#################################################################
#################################################################
#################################################################
#################################################################
##########
1.1 MiB/s
done
Bytes transferred = 6815748 (680004 hex)
..................................................... done
Un-Protected 53 sectors

..................................................... done
Erased 53 sectors
Copy to Flash... 10....9....8....7....6....5....4....3....2....1....done

arv7519rw #


Now power off and power on your router or type  reset . You are done ;)

Your router should boot up. Wait till it finish up (it takes 190 seconds the first time, afterwards only 35/45 seconds).

Hit enter to login into LEDE console or browse 192.168.1.1 to do web based config.


IV - Restoring original firmware

What if (for whatever reason) you wanted to return to the original firmware?

As I explained above you should have copied all those mtdX.bin files to a folder and run:

cat mtd0.bin mtd1.bin mtd2.bin mtd3.bin mtd4.bin mtd5.bin mtd6.bin mtd7.bin mtd8.bin mtd9.bin > dump.bin


Now that you have that dump.bin

Copy it to the TFTP server folder:

sudo cp -iv dump.bin /srv/tftp/

sudo chmod 644 /srv/tftp/dump.bin

ls -l /srv/tftp/


Set up your wired connection as explained above:

ip link
sudo ip link set enp2s0 down
sudo ip link set enp2s0 up
sudo ip addr flush dev enp2s0
sudo ip addr add 192.168.1.2/24 broadcast 192.168.255.255 dev enp2s0
ip addr show enp2s0

Connect an ethernet cable between you linux machine and the arv7519rw22 router

Connect the UART cable too.

Open a picocom terminal like:

picocom -b 115200  /dev/ttyUSB0


On it type (line by line followed by enter)

tftpboot dump.bin

run write-uboot-nor

reset


That's all !

May 27, 2016

LEDE DD for Orange LiveBox 2.1 Arcadyan ARV7519RW22

I started moving and testing LEDE (aka OpenWRT Reboot) as soon as it was announced.

So I started testing some Lantiq routers, one of them is ARV7519RW22.

While ARV7519RW22 is a quite capable router, I started building firmwares for front-facing routers with just the essentials while enabling hardening options at compile time.

This builds have:
* Stack-Smashing Protection enabled (strong)
* Buffer-overflows detection enabled (aggressive)
* RELRO protection enabled (full)
* a few security tweaks here and there
* FPU Emulation enabled
* Dnsmasq with full support (DNSSec)
* Dnscrypt
* LuCi (English & Spanish)
* LuCi QoS
* Curl
* Wifi drivers for Wifi USB dongles (only those supporting N mode: kmod-ath9k-htc, kmod-brcmfmac, kmod-carl9170, kmod-mt7601u, kmod-rt2800-usb, kmod-rtl8192cu)


Download:

  • r412 (May-26-2016)

Feb 13, 2016

OpenWrt 15.05 for NuCom R5010UNv2

I had two NuCom R5010UNv2 routers laying around for a year, I never had enough time to port OpenWrt to them until a few weeks ago.

I had it almost ready when I stumbled around Danitool patch in Trunk. So, the wise thing to do is just backport it to OpenWrt 15.05 (Chaos Calmer).

These commands would suffice to apply the patch and rebuild it yourself

git clone git://git.openwrt.org/15.05/openwrt.git
cd openwrt
git apply nucom06.gitdiff

The weird thing I noticed is one of the two routers gave me a ton of SquashFS read/write errors. I spent many hours trying to figure out the issue until I stumbled around this forum post. It was the CFE (bootloader). I replaced it with Danitool's newer CFE build and everything worked afterwards.

I compiled many revisions and here I share the last one I made.

Built from OpenWrt 15.05 r48666 (Feb 8, 2016) with the following:

  • Hardening options turned on mainly:
    • GCC format-security
    • Regular User+Kernel space Stack-Smashing Protection
    • Aggressive buffer-overflows detection
    • Full RELRO protection
    • Regular Stack Protector buffer overflow detection
  • LuCi with SSL support
  • Full 3G/4G usb modems support
  • WiFi N capable usb dongle support (Atheros/Ralink/Broadcom/Realtek)
  • Samba / Transmission (torrent) / Vsftpd-tls
  • QoS / VnStat / WonderShaper / DDNS / RelayD
  • OpenVPN / SSH Tunnel
  • Ext4 / FAT32 / NTFS 3g support + utilities
  • Dnsmasq with full support (DHCPv6 / DNSSec / Autho DNS / IPSet) + DNSCrypt
  • Richer Busybox
  • TCPDump / NMAP / NCat / cURL / wget all with SSL support
  • picocom + X/Y/Z-modem support + USB FTDI support
  • iperf / iftop / tmux
  • some tweaks in /etc/rc.local to harden TCP/IP stack
Most of the resource hungry services (Samba/Transmission/etc..) come disabled by default. Re-enabling them is easy when needed.


Download:
  • OpenWrt 15.05 r48666 with everything mentioned above.
  • OpenWrt 15.05 r48666 with everything mentioned above except that it comes with LuCi instead of LuCi-SSL.
  • OpenWrt 15.05 r48666 with 3G/4G support + RelayD + OpenVPN + VnStat + QoS + wShaper + DDNS.


Keep on hacking ;-)


Dec 18, 2015

Hardened Builds of Chaos Calmer (15.05) Stable Branch for Yacom Arv4518pw R01A & Yacom Arv7518pw

The other day I suspected one of my routers got messed up in a suspicious way. I couldn't find any proof of an attack but there was no explanation to why the jffs2 partition got corrupted in that way either. I used OpenWrt for years now, not a single incident happened. But this time I've got the feeling that perhaps because I ran something of interest to the guys who tap the network here so maybe someone tried to fiddle with it. Again no proof just suspicions.

Well, alright, time to mount up some defenses.

I wanted to share these hardened builds of Chaos Calmer (15.05) Stable Branch for Yacom Arv4518pw R01A & Yacom Arv7518pw. These builds were built with just the essential parts mainly LuCi & DNSCrypt. I had to remove IPv6 support and Swap Support for Arv4518pw R01A because its flash size is 4MB.

These builds were generated with a focus on security and therefore would be in most cases incompatible with most apps in OpenWrt software repository.


I tried a couple of times building them with grsecurity but no luck. The effort to backport patches from the latest release of grsecurity (currently kernel 4.3.3) to OpenWrt 15.05 kernel 3.18.x is just too much. I'll wait till OpenWrt Trunk and grsecurity coincide then I'll give it another try.


After flashing consider hardening TCP/IP via systctl options and be strict in your firewall config and follow OpenWrt security recommendations and set up DNSCrypt.


I'll probably update this post later for newer Chaos Calmer builds.


OpenWrt 15.05.1 (Chaos Calmer) r49231 (April-26-2016)


OpenWrt 15.05.1 (Chaos Calmer) r49053 (March-20-2016)


OpenWrt 15.05 (Chaos Calmer) r48220 (Jan-12-2016)


OpenWrt 15.05 (Chaos Calmer) r48186 (Jan-10-2016)


OpenWrt 15.05 (Chaos Calmer) r47895 (Dec-18-2015)


Nov 21, 2015

OpenWrt 15.05 for Orange LiveBox 2.1 Arcadyan ARV7519RW22

I managed to generate a OpenWrt 15.05 image for Orange LiveBox 2.1 (Arcadyan ARV7519RW22) because the official one gives a kernel panic due to flash partitioning bugs.

This router supports both VDSL & ADSL and is quite powerful. Full specs here:

Details:
  • Synced with Chaos Calmer 15.05 Final (LuCI git-15.248.30277-3836b45)
  • Includes LuCi & default packages as the standard OpenWrt release.
  • Includes VDSL.bin firmware
  • added patches to fix:  VFS kernel panic / VLans switch, Led names/colors, secondary usb.
  • Enabled FPU Emulation


Here you can download it: (Works for both hardware versions R01 VR9 1.1 and R02 VR9 1.2

Note: This image come with VDSL support enabled by default. If you want to use this router with a ADSL line then:

  1. Edit this file:    /etc/config/network
  2. and look for this line   option xfer_mode 'ptm'     and  change it to     option xfer_mode 'atm'

.


Nov 19, 2015

OpenWrt 15.05 for Yacom Arcadyan ARV4518PW

I managed to generate a OpenWrt 15.05 image for ARV4518PW because the official one gives a kernel panic due to lack of space. The idea here is to get it running while stripping things that can be installed later with Extroot:

I had to do these steps to fit OpenWrt in less than 4 MB of that router total flash memory :

  • Synced with Chaos Calmer 15.05 Final (LuCI git-15.248.30277-3836b45)
  • Disabled IPv6 support (can be restored by installing IPv6 packages mainly luci-proto-ipv6 + odhcp6c)
  • Removed swconfig package (because VLANs support is somehow still buggy. Wiki refs: 1, 2)
  • Removed debugging (useless anyway if you're not a developer)
  • Optimized compiling for size
  • Enabled FPU Emulation
  • Included LuCi
  • Added : USB2 support + Ext4 Filesystem for Extroot + block-mount

The result is an image that fits well in ARV4518PW with 108 KB of free flash space.

Here you can download it (Pay attention to your router hardware version in its back: either R01A or R01):

or

Note: if you get a VFS not syncing kernel panic then check your router's MTD partitions size and probably you need to reflash a 64kb u-boot with the propre environment parameters.


what follows is just some details as a reference:

List of included packages    
$ opkg list-installed
atm-esi - 2.5.2-5
base-files - 157-r46767
block-mount - 2015-05-24-09027fc86babc3986027a0e677aca1b6999a9e14
br2684ctl - 2.5.2-5
busybox - 1.23.2-1
dnsmasq - 2.73-1
dropbear - 2015.67-1
firewall - 2015-07-27
fstools - 2015-05-24-09027fc86babc3986027a0e677aca1b6999a9e14
hostapd-common - 2015-03-25-1
iptables - 1.4.21-1
iw - 3.17-1
iwinfo - 2015-06-01-ade8b1b299cbd5748db1acf80dd3e9f567938371
jshn - 2015-06-14-d1c66ef1131d14f0ed197b368d03f71b964e45f8
jsonfilter - 2014-06-19-cdc760c58077f44fc40adbbe41e1556a67c1b9a9
kernel - 3.18.20-1-794b781336c70a9d477a86c93fdb83d7
kmod-ath - 3.18.20+2015-03-09-3
kmod-ath5k - 3.18.20+2015-03-09-3
kmod-atm - 3.18.20-1
kmod-cfg80211 - 3.18.20+2015-03-09-3
kmod-crypto-aes - 3.18.20-1
kmod-crypto-arc4 - 3.18.20-1
kmod-crypto-core - 3.18.20-1
kmod-crypto-hash - 3.18.20-1
kmod-fs-ext4 - 3.18.20-1
kmod-gpio-button-hotplug - 3.18.20-1
kmod-ipt-conntrack - 3.18.20-1
kmod-ipt-core - 3.18.20-1
kmod-ipt-nat - 3.18.20-1
kmod-leds-gpio - 3.18.20-1
kmod-ledtrig-usbdev - 3.18.20-1
kmod-lib-crc-ccitt - 3.18.20-1
kmod-lib-crc16 - 3.18.20-1
kmod-ltq-adsl-danube - 3.18.20+3.24.4.4-1
kmod-ltq-adsl-danube-fw-a - 0.1-1
kmod-ltq-adsl-danube-mei - 3.18.20-1
kmod-ltq-atm-danube - 3.18.20-1
kmod-ltq-hcd-danube - 3.18.20-1
kmod-mac80211 - 3.18.20+2015-03-09-3
kmod-nf-conntrack - 3.18.20-1
kmod-nf-ipt - 3.18.20-1
kmod-nf-nat - 3.18.20-1
kmod-nf-nathelper - 3.18.20-1
kmod-nls-base - 3.18.20-1
kmod-ppp - 3.18.20-1
kmod-pppoa - 3.18.20-1
kmod-pppoe - 3.18.20-1
kmod-pppox - 3.18.20-1
kmod-scsi-core - 3.18.20-1
kmod-slhc - 3.18.20-1
kmod-usb-core - 3.18.20-1
kmod-usb-storage - 3.18.20-1
kmod-usb2 - 3.18.20-1
libblobmsg-json - 2015-06-14-d1c66ef1131d14f0ed197b368d03f71b964e45f8
libc - 0.9.33.2-1
libgcc - 4.8-linaro-1
libip4tc - 1.4.21-1
libip6tc - 1.4.21-1
libiwinfo - 2015-06-01-ade8b1b299cbd5748db1acf80dd3e9f567938371
libiwinfo-lua - 2015-06-01-ade8b1b299cbd5748db1acf80dd3e9f567938371
libjson-c - 0.12-1
libjson-script - 2015-06-14-d1c66ef1131d14f0ed197b368d03f71b964e45f8
liblua - 5.1.5-1
libnl-tiny - 0.1-4
libpthread - 0.9.33.2-1
libubox - 2015-06-14-d1c66ef1131d14f0ed197b368d03f71b964e45f8
libubus - 2015-05-25-f361bfa5fcb2daadf3b160583ce665024f8d108e
libubus-lua - 2015-05-25-f361bfa5fcb2daadf3b160583ce665024f8d108e
libuci - 2015-04-09.1-1
libuci-lua - 2015-04-09.1-1
libxtables - 1.4.21-1
linux-atm - 2.5.2-5
ltq-adsl-app - 3.24.4.4-2
lua - 5.1.5-1
luci - git-15.248.30277-3836b45-1
luci-app-firewall - git-15.248.30277-3836b45-1
luci-base - git-15.248.30277-3836b45-1
luci-i18n-base-en - git-15.248.30277-3836b45-1
luci-i18n-firewall-en - git-15.248.30277-3836b45-1
luci-lib-ip - git-15.248.30277-3836b45-1
luci-lib-nixio - git-15.248.30277-3836b45-1
luci-mod-admin-full - git-15.248.30277-3836b45-1
luci-proto-ppp - git-15.248.30277-3836b45-1
luci-theme-bootstrap - git-15.248.30277-3836b45-1
mtd - 21
netifd - 2015-06-08-8795f9ef89626cd658f615c78c6a17e990c0dcaa
odhcpd - 2015-05-21-2ebf6c8216287983779c8ec6597d30893b914a7c
opkg - 9c97d5ecd795709c8584e972bfdf3aee3a5b846d-7
ppp - 2.4.7-6
ppp-mod-pppoa - 2.4.7-6
ppp-mod-pppoe - 2.4.7-6
procd - 2015-08-16-0da5bf2ff222d1a499172a6e09507388676b5a08
procd-nand - 2015-08-16-0da5bf2ff222d1a499172a6e09507388676b5a08
rpcd - 2015-05-17-3d655417ab44d93aad56a6d4a668daf24b127b84
ubi-utils - 1.5.1-2
ubox - 2015-07-14-907d046c8929fb74e5a3502a9498198695e62ad8
ubus - 2015-05-25-f361bfa5fcb2daadf3b160583ce665024f8d108e
ubusd - 2015-05-25-f361bfa5fcb2daadf3b160583ce665024f8d108e
uci - 2015-04-09.1-1
uhttpd - 2015-08-17-f91788b809d9726126e9cf4384fedbbb0c5b8a73
uhttpd-mod-ubus - 2015-08-17-f91788b809d9726126e9cf4384fedbbb0c5b8a73
usign - 2015-05-08-cf8dcdb8a4e874c77f3e9a8e9b643e8c17b19131
wpad-mini - 2015-03-25-1


$ df -h
Filesystem                Size      Used Available Use% Mounted on
rootfs                  320.0K    212.0K    108.0K  66% /
/dev/root                 3.0M      3.0M         0 100% /rom
tmpfs                    29.9M    308.0K     29.6M   1% /tmp
/dev/mtdblock5          320.0K    212.0K    108.0K  66% /overlay
overlayfs:/overlay      320.0K    212.0K    108.0K  66% /
tmpfs                   512.0K         0    512.0K   0% /dev
    
    
$ cat /proc/mtd 
dev:    size   erasesize  name
mtd0: 00010000 00002000 "uboot"
mtd1: 00010000 00010000 "uboot_env"
mtd2: 003d0000 00010000 "firmware"
mtd3: 001165fb 00010000 "kernel"
mtd4: 002b9a05 00010000 "rootfs"
mtd5: 00050000 00010000 "rootfs_data"
mtd6: 00010000 00010000 "boardconfig"

.


Mar 1, 2015

Flashing Yacom Arcadyan ARV4518PW with OpenWRT 14.07 / 12.09

Arcadyan ARV4518PW Router also known as SMC-7908-ISP is one of the few routers with Lantiq SoC capable of connecting to the Internet with their integrated xDSL modem.


There are guides and HowTos explaining how to flash this router with OpenWRT. A UART USB-to-TTL cable is a must to flashing.

Here is a recap for all the steps.
1. backup your routers original firmware and wifi calibaration data.
2. flash the bootloader u-boot.
3. from u-boot, we will issue commands to download and install OpenWRT into the flash.


Details:

1. Backup your router's firmware & WiFi calibration data

You will need a Serial Communication software like Putty, CuteCom or Screen installed on Linux.

Then need to get BrnDumper from here. (Works reliably on a 32bits Linux)

Connect your UART cable.


Open Terminal and issue:

screen /dev/ttyUSB0 115200


Power up your router

when text starts showing up on Terminal, hit spacebar 3 times

then hit  !  and quit  screen


now open another Terminal Tab/Window and run brndumper as follow:

sudo ./brndumper --port=/dev/ttyUSB0


and do a full dump and a Wifi calib data dump.
from  $b0000000  to  $b0400000 -> full dump
from  $b03F0000  to  $b0400000 -> wifi calib data dump

it's going to take approx 30mins.


2. flash the bootloader u-boot

when it finishes, power off the router. Start CuteCom or a Serial Comm software capable of sending files using XModem and change its Input Mode to "No Line End".

Power on the router. When the text starts showing up hit spacebar 3 times then hit respectively:

!
U
0 
Y

Then send u-boot file via XModem


When it's done restart the router


3. Installing OpenWRT from u-boot

Install a TFTP Server. Download either of these OpenWRT images, rename it to ARV4518PW-squashfs.image and put it into tftp folder.


Note: these images are custom compiled and patched to fix Wifi on 12.09 and let them fit well on the 4MB of flash while having extra drivers (USB2, Ext4, USB Storage) and still have enough free space to do other things.


Connect a network cable to the router, set a static ip like, i.e:

ifconfig eth0 192.168.144.100 netmask 255.255.255.0 up


the ip address 192.168.144.100 came from the output values of  printenv  which you can issue from CuteCom.


From CuteCom issue:

setenv kernel_addr 0xb0020000

saveenv

run update_openwrt


when it finish, issue:

reset


Enjoy.

Feb 28, 2015

Flashing Movistar Zyxel P870HNU-51B with OpenWRT 14.07

With enough coffee I managed to compile OpenWRT 14.07 for Zyxel P870HNU-51B distributed by Movistar.


It was the first time I ported a new router to OpenWRT. I learned a lot. Here are some references:
This router is the successor of ZyXEL P-870HW-51a and have almost the same hardware specs as ZyXEL P-870HN-5xb but with a 16MB of flash memory instead of 8MB. It's a VDSL-Only router.


Downloads:
  • Original Movistar Firmware (.bin file) or if needed, the original installable assistant (.exe) which includes that .bin file in its installation folder)
  • OpenWRT 14.07 (r42625) with LuCI, 3G Modems Support, RelayD, IPv6, NTFS-3G, vFat, Ext4, USB v2, USB 1.1 OHCI, usb-storage-extras, block-mout, fdisk, Kernel with FPU +  Drivers for USB Wifi Cards (ath9k-htc, brcmfmac, carl9170, libertas-usb, zd1201, zd1211rw, p54-usb, rt2500-usb, rt2800-usb, rt73-usb, rtl8187, rtl8192ce/cu/de/se)
  • A lighter OpenWRT 14.07 (r42625) with LuCI, 3G Modems Support, RelayD, IPv6, NTFS-3G, vFat, Ext4, USB v2, USB 1.1 OHCI, usb-storage-extras, block-mout, fdisk, Kernel with FPU. [WITHOUT] the extra USB Wifi cards support
  • A patch for Barrier Breaker if you need to compile it yourself.
  • OEM Bootlog if needed
  • OEM extra info if needed
  • OpenWRT Bootlog if needed

Flashing either from:
  • Router's web interface: Maintenance > Tools > Firmware
  • CFE (powering up the router while pressing the reset button a few seconds then access CFE web interface http://192.168.1.1  your OS needs a static network config)
  • Serial UART (USB-to-TTL) from CFE Bootloader. issue ATUR. Then send the firmware via XModem
  • tftp from telnet. login with 1234/1234. then issue sh to get a busybox shell, then: tftp -g -t i -f zz112BKW0b11.bin 192.168.1.2    or   tftp -g -t i -f openwrt-P870HNU-51b-squashfs-cfe.bin 192.168.1.2  (but you need to have a tftp server set up first)

The router is stable and running well. However:
  • This router's WIFI works only with b43 or with the proprietary driver, not with brcmsmac.
  • LEDs are working except for USB. I couldn't find its GPIO. Also, Lan LEDs  become on only if the cables were already attached when the router was booting up.


Enjoy it. 


Feb 18, 2015

Flashing DLink DSL-524T and DSL-G624T with OpenWRT 14.07

DLink DSL-524T was my first experience with a router that was able to connect to the Internet using OpenWRT. Its integrated DSL modem is fully support under OpenWRT. Later I bought DLink DSL-G624T which has the same hardware specs as DSL-524 but with an integrated wireless mini-pci card which is while supported offers no WPA/WPA2 encryption, only WEP which is insecure.

Both work great under OpenWRT 10.03.1 but not under 12.09 which feels slower. While 14.07 feels snappier, it consumes all the 4MB of flash memory.

Well, today I've got some time to build a lightweight OpenWRT 14.07 for both DSL-524T and DSL-G624T.

The installation steps are documented for both.

As reference, these are the steps I did for DLink G624T.
# under root or using sudo

echo 0 > /proc/sys/net/ipv4/tcp_frto

# just a second or two after the router is powered up

ftp -n 192.168.1.199

user adam2

# adam2 as a password also

quote "SETENV mtd1,0x90010000,0x903f0000"

binary

hash

quote MEDIA FLSH

put "openwrt-ar7-generic-squashfs.bin" "openwrt-ar7-generic-squashfs.bin mtd1"

quote REBOOT

bye

 
Notes: While both DSL-524T and DSL-G624T ran OK under 14.07 you should go easy with LuCi as 16MB of ram is really the minimum requirement. After setting things up consider disabling LuCi for better performance. A /etc/init.d/luci disable would suffice.


A USB-to-UART (USB-to-TTL) cable is not necessary but  would be helpful in case you want to know what happens while flashing it or setting it up.


Red is GND, Green is RX and White is TX

Usually you need to setup CuteCom or Putty to 38400 baud, 8 bit, no parity, 1 stop bit. Serial (/dev/ttyUSB0)


Jan 30, 2015

Flashing Movistar Zyxel P870HW-51Av2 with OpenWRT 14.07

Movistar Zyxel P870HW-51Av2 is a VDSL only router which isn't good for where I live but has a good CPU (BCM4350 V3.1 / 400MHz) and an acceptable amount of RAM (32MB) but with a limited flash space (4MB). However, it can get flashed with OpenWRT 14.07.


This router has CFE bootloader which makes flashing OpenWRT very easy using just a web browser. However, I wasn't able to trigger it by pressing Reset button for a few seconds during power on.

The trick to trigger CFE it is by flashing Zyxel unbranded firmware first using web admin console at http://192.168.1.1

After it finishes, flash this corrupted firmware like above to brick it and get CFE prompt afterwards.

When it get bricked you have to set a static IP for your PC (i.e: 192.168.1.2 / 255.255.255.0) and then access http://192.168.1.1

Get openwrt-P870HW-51a_v2-squashfs-cfe.bin from here and flash it. That's all


Just as a reference, I flashed the wrong firmware by accident and it became stuck in a boot loop. I had to try to unbrick it using a USB-to-TTL.


Red is GND ; Green is RX ; White is TX


This was the first time I interact with Zyxel ZLD command prompt. Unbricking was easy. just:

ATSH

ATHE

ATUR

then I sent this file via XModem (using CuteCom under GNU-Linux or TeraTerm under Windows)


Sep 24, 2008

How To Install PostgreSQL And phpPgAdmin Support In XAMPP


!! This article was written years ago and probably irrelevant today !!

XAMPP is an easy to install Apache distribution containing MySQL, PHP and Perl, plus many additional modules. The whole package is well integrated and can save a lot of time and hassle for the inexperienced web developer. It's available on four platforms Windows, GNU/Linux, Mac OS X and Solaris which gives a lot practical benefit to those who use it.

PostgreSQL is a well known database that may be more suitable for some tasks or workloads than others. phpPgAdmin is a web-based administration tool for PostgreSQL, exactly as phpMyAdmin for MySQL.

1. Install PostgreSQL and phpPgAdmin in Windows :

1.1 Install PostgreSQL
Assuming you have already download and installed XAMPP into c:\XAMPP, go and get the latest version of PostgreSQL for Windows. Download the version with the installer, not the one with only binaries.

Usually, it's a .zip package, extract it and install Microsoft Visual C++ 2005 redistributable vcredist_x86.exe first!

Now, double-click postgresql-8.3.msi, choose your install language, then have a look at installation notes as you may find useful info there.

Change the default install folder to c:\xampp\pgsql
The default install options in the following step are OK, but select everything you are unsure.

Enter a password for the user account "postgres" and leave everything as is in Service Configuration, then proceed to the next step. (You will need that password for future upgrades)

In Initialize Database Cluster:
  • Enable "Accept connections on all addresses, not just localhost" if you want.
  • Choose a different Encoding for both Server and Client (i.e: UTF8 for unicode support)
  • Enter a password for the DB administrator account "postgres".
Proceed as PL/pgsql is enabled by default in Procedural Langauges, then select Contrib Modules you want (select everything if you are unsure). Click on Install.

1.2 Install phpPgAdmin
Go and get the latest phpPgAdmin zip package and extract it into C:\xampp\phpPgAdmin\ . Make sure the files and folders extracted are in that folder, not within another sub-folder.

Then open "config.inc.php" found in C:\xampp\phpPgAdmin\conf\ and set "extra_login_security" to false
$conf['extra_login_security'] = false;

Now, open c:\xampp\php\php.ini and make sure "extension=php_pgsql.dll" is uncommented

Finally, open c:\xampp\apache\conf\extra\httpd-xampp.conf and in section <IfModule mime_module> add
Alias /phppgadmin "c:/xampp/phpPgAdmin/"
<Directory "c:/xampp/phpPgAdmin">
    AllowOverride AuthConfig
    Order allow,deny
    Allow from all
</Directory>

That's all, you can now access phpPgAdmin from your web browser with http://localhost/phppgadmin/

Notes:
  • For more info about PostgreSQL Installer visit http://pginstaller.projects.postgresql.org/FAQ_windows.html
  • You may use Stack Builder shipped with PostgreSQL to add new functionalities.
  • Visit the phpPgAdmin FAQ for any further info http://phppgadmin.sourceforge.net/?page=faq

For Ubuntu Linux users I recommend this article.

Sep 13, 2008

How to Properly Setup Samba, Create Public Shares and Anonymously Browse Windows Shares on GNU/Linux


!! This article was written years ago and probably irrelevant today !!

Sometimes sharing files and folder between Windows and GNU/Linux can be annoying and problematic especially for beginners.

In this article we're going to see how to setup Samba and how to get both Windows and GNU/Linux sharing and browsing public share the right way.

We have two scenarios :
1. GNU/Linux browsing Windows shares.
2. Windows browsing Samba shares.

Let's start with first one.

1. GNU/Linux browsing Windows shares.
First of all, we need to do some tweaking on Windows to allow easy browsing.

Step 1:
Make sure your Windows machine has a name and belongs to a workgroup like MSHOME
>Go to Control Panel, System, on "Computer Name" tab click on change Button to change the name and workgroup.

Step 2:
Make sure that Windows XP Firewall does block incoming connections.
>Go to Control Panel, Windows Firewall, on the Exceptions tab check "File and Printing Sharing"


Step 3:
Make sure Windows XP doesn't deny access to your computer from the network.
>Go to Control Panel, Administrative Tools, Local Security Policy. On the right panel browse through Security Settings-> Local Policies-> click on User Rights Assignment

Now, from that list we need to adjust two settings. The first one is "Access this computer from the network". Double click on it and make sure that at least "Everyone" group is there, if not add it.

The second setting is "Deny access to this computer from the network". Select "Guest" account in that list and remove it.

Step 4:
This one is to ensure that the guest account in Windows XP can be used by other machines on the network to authenticate for public access.
>Go to Control Panel, Administrative Tools, Computer Management. On the right panel browse through System Tools-> Local Users and Groups-> Users. Right click on Guest account, Select Properties then uncheck "Account is disabled"


Step 5: Reboot.

Now, let's create a public share on Windows. Create a folder named "Public" in C: or any other partition or drive. Right click on it, click on Properties, Select "Sharing" tab, then check "Share this folder on the network" to share the folder and check "Allow network users to change my files" if you want to give write access to network users.


That's it! You have now created a shared public folder, accessible from local network for all users.


2. Windows browsing Samba shares.

Step 1:
Make sure Samba Server is installed.

If you are using a Debian based distro like Ubuntu, select and install Samba package from Synaptic or type in terminal:
sudo apt-get install samba

Step 2:
Now, you should know that Samba config file is usually found in: /etc/samba/smb.conf
But some distro install Samba without doing any extra config and leave that task to the user. In both cases it easy to config Samba.

From Terminal, typing : (assuming you're using Ubuntu)
sudo gedit /etc/samba/smb.conf
You can replace gedit with your text editor of choice (ex: nano, kwrite, etc.)

Now, in "global" Section, try to find the following settings and change them so that they are like these:
[global]
workgroup = MSHOME
security = share
null passwords = yes
guest account = nobody
passdb backend = tdbsam
netbios name = %h

Then scroll down to the bottom and add these parameters:
[Public]
comment = Public Folder
path = /var/public
public = yes
writable = yes
only guest = no
guest ok = yes
available = yes
browsable = yes
create mask = 0666
directory mask = 0777

Save the file and go back to Terminal to finish the remaining steps.

Let's create the public folder mentioned above in "path= /var/public". In Terminal type in:
sudo mkdir /var/public
sudo chmod 777 /var/public
Now, we need to add "nobody" account to Samba users list and set its password to null (empty).
sudo smbpasswd -a nobody
sudo smbpasswd -n nobody

That's it! For this to take effect either reboot or if you are using Ubuntu type in Terminal:
sudo /etc/init.d/samba restart


Some Notes:
Note #1:
Due to a bug in Gnome 2.22, whenever you try to access a shared folder in the network you are presented with a dialog box to enter the username and password. If that's the case either ignore that box or type in "guest" as the username and leave the password empty.

Note #2:
Just as mentioned in my comment down this post, you may need to give permissions to access folders placed in /var/public belonging to/owned by your user account.
Anyway, If your Windows client starts saying that the share is not accessible, you will need to do a:
sudo chmod -R 777 /var/public/

or (if you don't want executable attribute given to everything)
sudo chmod -R 766 /var/public/
sudo find /var/public/ -type d -exec chmod 777 {} \;

Note #3:
Some Distros deny incoming connections to your GNU/Linux box through /etc/hosts.deny
If that's the case make sure that the file /etc/hosts.allow allows incoming connections.
sudo nano /etc/hosts.allow
Then add this line into it.
ALL: ALL

Note #4:
The recently released Samba 3.2 has some nice new feature such as enhanced compatibility with Windows Server 2008/2003, Vista and Active Directory.

Note #5:
For Vista users you may need to add this parameters to Global Section in smb.conf
map acl inherit = yes
Also, in Windows Vista click on Run.. and type in: secpol.msc
Go to "Local Policies"-> "Security Options" then navigate to the policy:
"Network Security: LAN Manager authentication level" and double click on it.

Change its value from "NTVLM2 responses only" to "LM and NTLM – use NTLMV2 session security if negotiated."

Note #6:
If your Windows machine is a Windows Server 2003 instead of XP, then you should disable signing/encryption which get activated automatically when you setup a Domain Controller.

Go to Control Panel, Administrative Tools, Domain Controller Security Policy.
Browse through "Local Policies"-> "Security Options", then set both:
"Microsoft network server: Digitally sign communications (always)" and
"Domain member: Digitally encrypt secure channel data (when possible)" to Disabled.